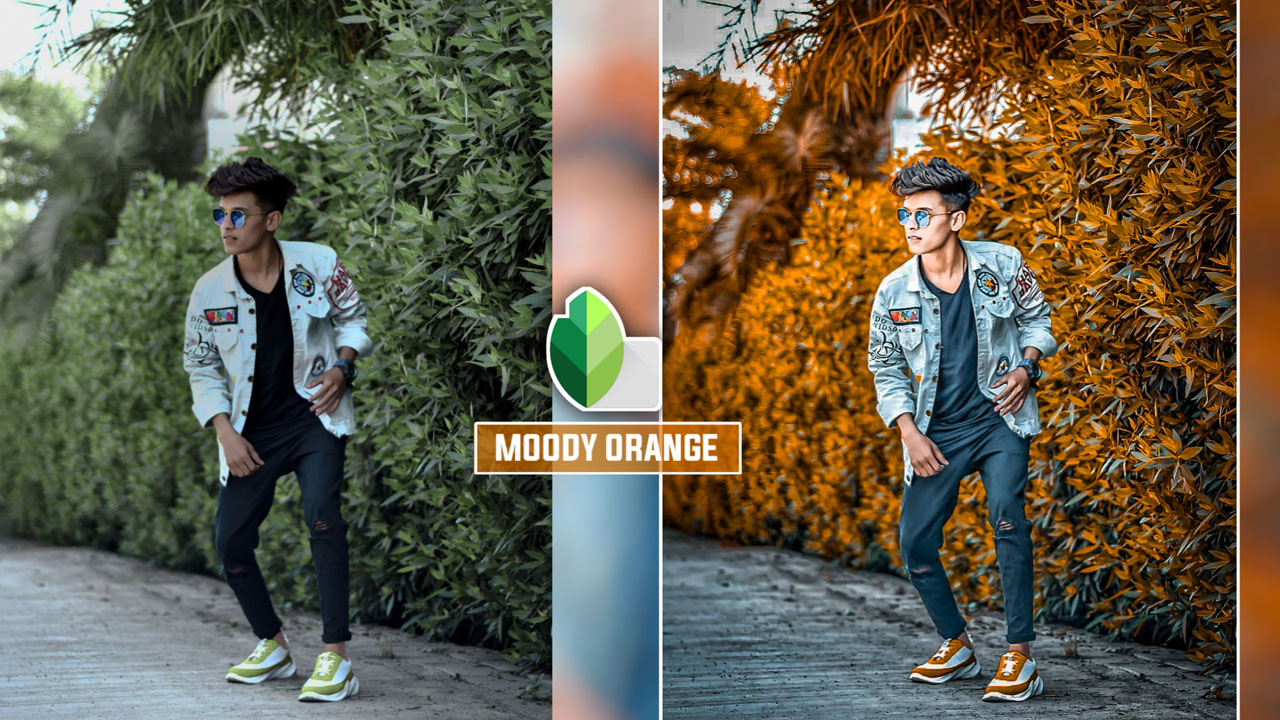
Hello guys, what's up. 'The only source of mobile editing PNGs and Background' for snapseed and lightroom. I always come with cool editing tricks and tips which change your image to a completely different looking image. Those who are new to my blog, do read my other blog as well, it will give you a more clear understanding of what image preset you can use in which image. I always add cool editing tutorials keeping modern editing and look in mind.
I want to thank each one of you, for your love and support I am getting for my videos and blog, I am overwhelmed with the response. As a thank, your gift I have made this different style of editing. As we know, we are living in a time where social media is becoming a core part of our life and looking good in those platforms becoming more and more crucial for people than ever before. For this world of social media, I bring to you, regular updates with my new editing guide and tutorial for beginners and experienced individuals. Some times it happens even if you have expensive DSLR, good lighting equipment then also you don't get social media-friendly pictures. To compensate for the lack of quality my snapseed editing tutorials will give you a helping hand for post-production. I have already explained to you in one of my posts that even if you are clicking extraordinarily pictured you need some bit of editing to make our picture smooth and clean. Similarly, my presets of snapseed will help you change your image from plain and simple to dramatic looking, differently colored images.
Today we are going to learn about aqua and orange tips and tricks for our images. Turning our dull and plain image into aqua and orange looking high contrast image in our snapseed editing application. I have created a video on this topic on my youtube channel. You can watch that tutorial on snapseed editing and you can have a more clear understanding of the modern editing concept. Before we proceed further with the guidance on adding the effect in your snapseed editing tool. I urge you to read this blog until the end because that will motivate me to put more effort into making these editing tutorials. I am investing my time and effort in bringing something new to you on a daily basis and I just need you a few mins of reading and suggestions for my improvement. If you have any issues while using my preset you can DM me. I am always available on Instagram, where you can also follow me to get more detail about my upcoming blog.
Let's start with our step by step guide where you will learn how you can add this aqua filter preset in your image and get this aqua and orange effect in your snapseed application. These steps are written in detail for an easier understanding of beginner who wants to learn "How to create snapseed preset in mobile".
Read carefully before you proceed.
About Aqua & Orange Presets :
This Photo editing Trick was launched by me ( AF Edit ), In this photo editing there is the use of Lightroom app. Just you need to have a clear quality photo for editing like above and also you have to follow the above steps, and also editing makes your photo like aqua color.
Free Preset :
Lightroom presets DNG file, use in mobile lightroom app, all premium features no bugs and error, high-quality premium preset.
HOW TO USE LIGHTROOM PRESET:
If you do not know how to use a preset in the mobile lightroom app, then I will tell you the steps. With the help of that, you will learn how to use that preset.
- First of all, you guys have to get the preset from my website.
- Then you have to import the DNG file which I have provided into the mobile lightroom app.
- Then you have to copy the setting of the preset by clicking on the 3 dots on the top right of the mobile lightroom app.
- Then you have to import your photo, whatever you want to edit into the lightroom app.
- Then you have to click on the paste settings, then your photo preset will be applied.
- And then after doing that you have to do the color adjustment, whatever you want to adjust.
- That's it, now your photo is successfully edited.


Hi
ReplyDeletenice
ReplyDeleteHkk
ReplyDeleteNice pic bro
ReplyDeleteAwesome
ReplyDeletePost a Comment